WordPress theme installation is the most crucial step after setting up the WordPress installation. It’s the ultimate key to presenting the full view of your website to visitors.
You’ve set up your WordPress website, and now you’re ready to give it a look with a new theme. But how do you go about installing a WordPress theme? Don’t worry; it’s easier than you might think!
There are thousands of WordPress themes available, free or paid, to suit business requirements. WordPress repository provides free themes that can be installed with ease. There are other places where paid versions of themes are available, which you can also install using the process we are going to describe.
In this guide, we’ll walk you through three simple methods for installing a WordPress theme. You can choose one that suits you better.
What is a WordPress Theme?
Before a deep dive into methods to install a WordPress theme, let’s take a look at what a WordPress theme actually is? A WordPress theme is a collection of files created by developers that control the overall design and appearance of a WordPress website. It includes templates, stylesheets, and additional functionality to customize the layout, fonts, colors, and other visual elements of a website without touching the actual code.
Themes allow users to easily change the look of their site without altering the underlying content or structure. In a broader sense, developers made various themes for user ease to control the look of their websites.
Pro Tip! If you already have a working website and want to change the theme? It is recomended to make a backup to avoid any frustrating situtaion or something would not work as expected. You can read our step by step guide How to backup your wordpress website?
WordPress Theme Installation Methods
When setting up a WordPress website, understanding the various installation methods for themes is crucial. From traditional manual installation to convenient one-click options, exploring these methods ensures a smooth and efficient process for customizing your site’s appearance.
Method 1: Installing a Theme from the WordPress Theme Directory
The WordPress Theme Directory is a collection of thousands of free themes that you can easily install directly from your WordPress dashboard.
Step 1: Log in to your WordPress dashboard.
At the first step, you need to login to WP dashboard as administrator where you can manage your website with the power of WordPress. For instance, you can create pages, menus, posts, manage themes, plugins and other settings.
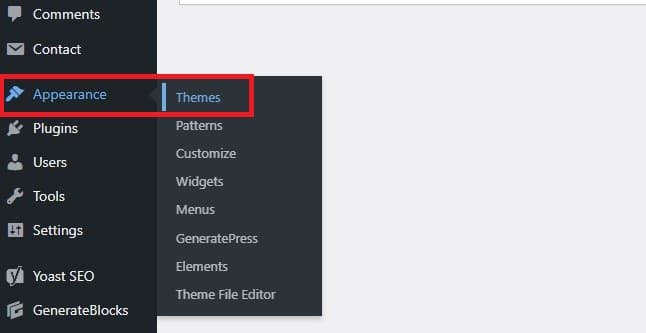
Step 2: Navigate to themes repository.
Next, click the Appearance » Themes to see the list of already available themes in your WP dashboard. Here you can add new, delete or change the activated theme. Activated theme is the one which is used for your website.
Step 3: Add new theme.
When you click on add new button in the top right corner, you will land over the wordpress repository. You’ll see a list of featured themes, as well as a search bar where you can search for specific themes. Use the search bar to find a theme that suits your website’s style and functionality.
Step 4: Install theme.
Once you’ve found a theme you like, hover over it and click the “Install” button. WordPress will take some time to dowload theme files and notify you when theme installed successfully. You can activate newly added theme for your website by clicking activate button.
Method 2: Uploading a Theme from Your Computer
If you’ve purchased a premium theme or downloaded a theme from a third-party website, you can upload it to your WordPress website manually. All you need to get or download a theme in a zip file. You can also download a free theme directly from wordpress official website wordpress.org and then upload to your website WP dashboard. In this tutorial, we are going to download astra theme from wordpress official repository and install by upload button through WP dashboard.
Pro Tip! If you have purchased a premium wordpress theme and want to install, you need to download or get theme zip file from where you have bought premium theme. Then follow the same procedure from upload theme file described in this method.
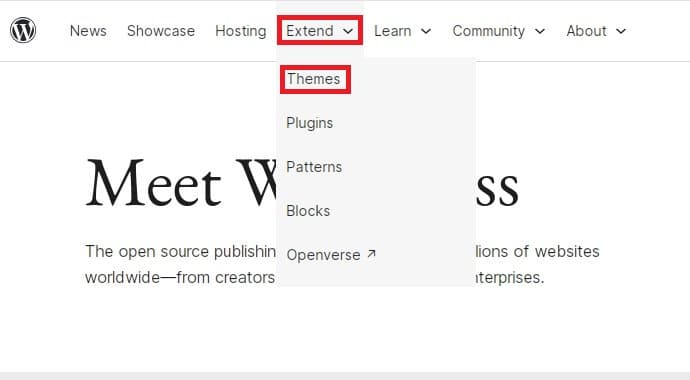
Step 1: Download theme file.
First, go to wordpress offical website by visiting wordpress.org address. In the top menu, click on Extend » Themes
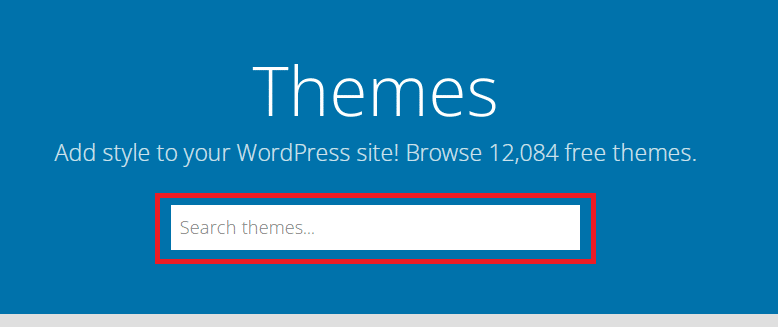
Next, use search function to find desired theme. In our case we are searching for astra theme.
Hover over theme image and then click download button.
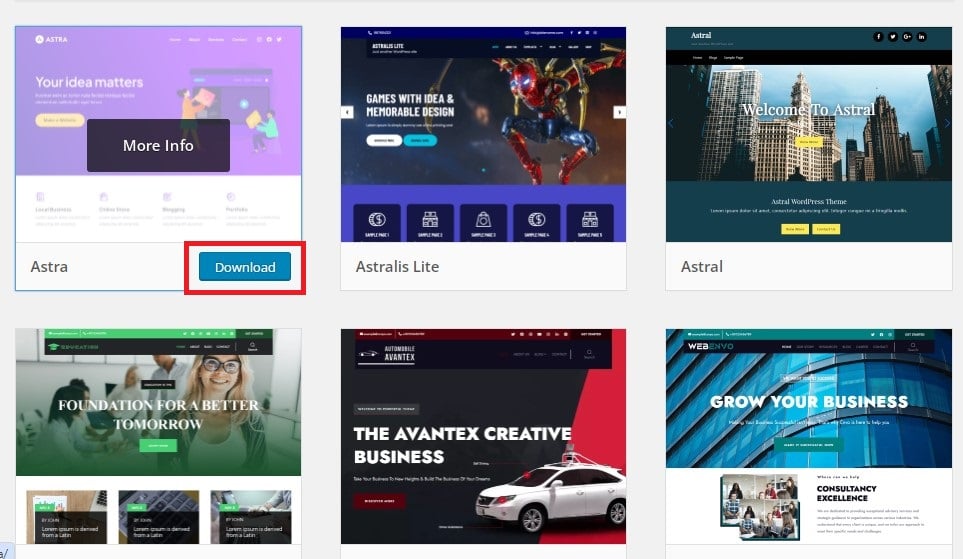
Congratulations! you downloaded theme zip file in your computer. Now it’s time to upload this zip file to your website WP dashboard.
Following the same procedure as illustrated in Method 1 above, with an additional step explained below
- Log in to your WordPress dashboard.
- Navigate to Appearance > Themes.
- Click on the “Add New” button at the top of the page.
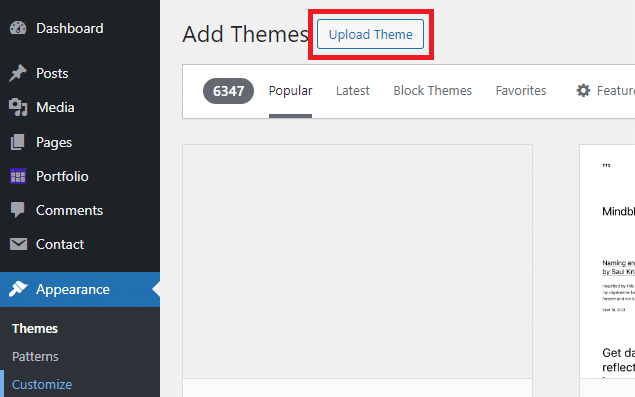
Step 2: Upload theme file
From the top of the page, click on the “Upload Theme” button.
Step 3: Choose file and install theme
Click on the “Choose File” button and select the .zip file of the theme you downloaded to your computer. Once you’ve selected the file, click the “Install Now” button.
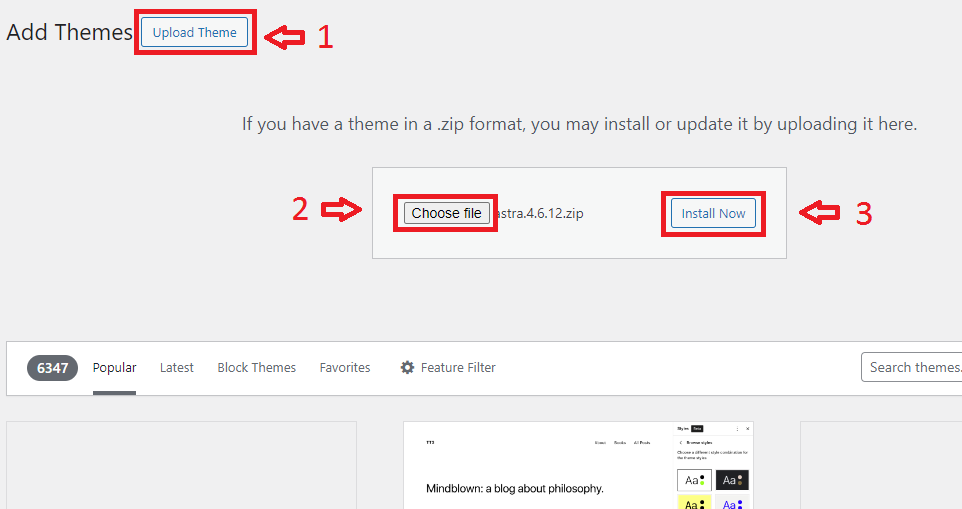
After the theme has been installed, click the “Activate” button to make it the active theme for your website.
Pro Tip! You can intsall various wordpress themes but you only activate one of them at a time.
Conclusion
Installing a WordPress theme is a simple process that can be done in just a few clicks. Whether you’re using a theme from the WordPress Theme Directory, or uploading a theme from your computer, you can easily give your website a fresh new look and feel. So go ahead, explore different themes, and find the perfect one to make your WordPress site stand out! Good luck!